Table of Contents
I decided to run my own registry, the more I got into docker and the more stuff I wanted to run I decided to give it a try.
It's very straight forward to spin up an Azure Container registry
Pricing
There are 3 tiers to the pricing for an Azure Container Registry.
Basic:
Price Per Day: EUR 0.141
Storage: 10 GB
Total Web Hooks: 2
Standard:
Price Per Day: EUR 0.563
Storage: 100 GB
Total Web Hooks: 10
Premium:
Price Per Day: EUR 1.406
Storage: 500 GB
Total Web Hooks: 100 - Can request more
Geo Replication: EUR 1.406 per region.
Additional Storage
Basic, Standard, Premium €0.003/day Per GB
Create Azure Container Registry
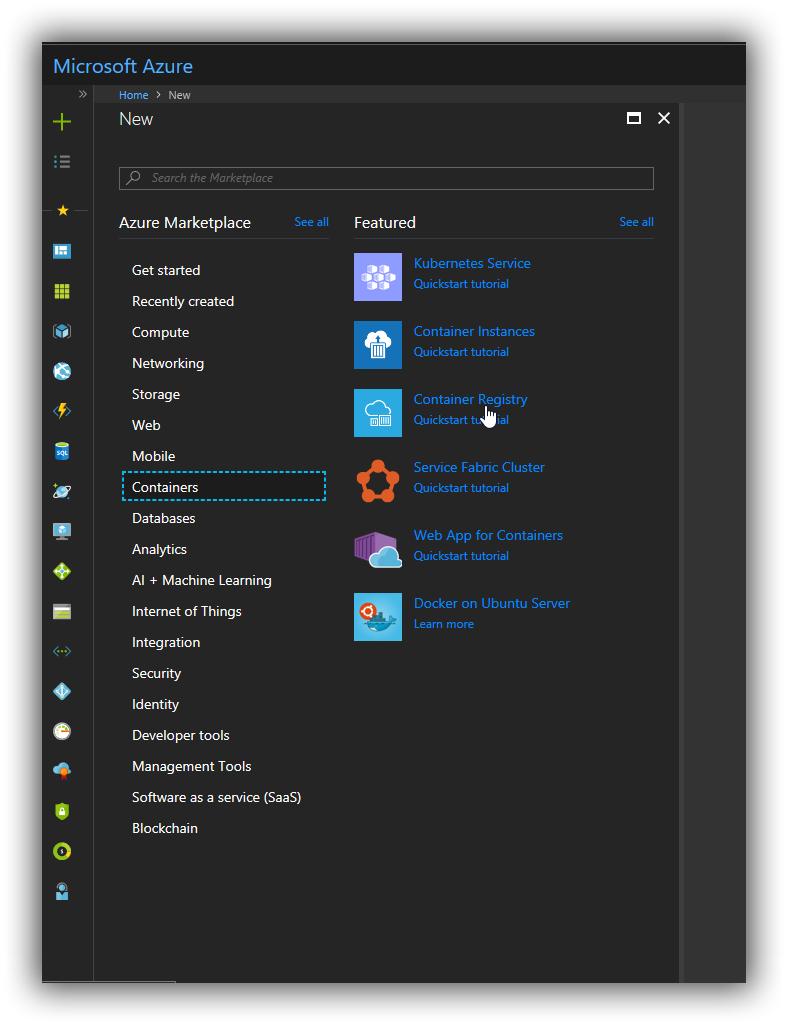
In the Market place, head to the "Containers" Option, select the "Container Registry"

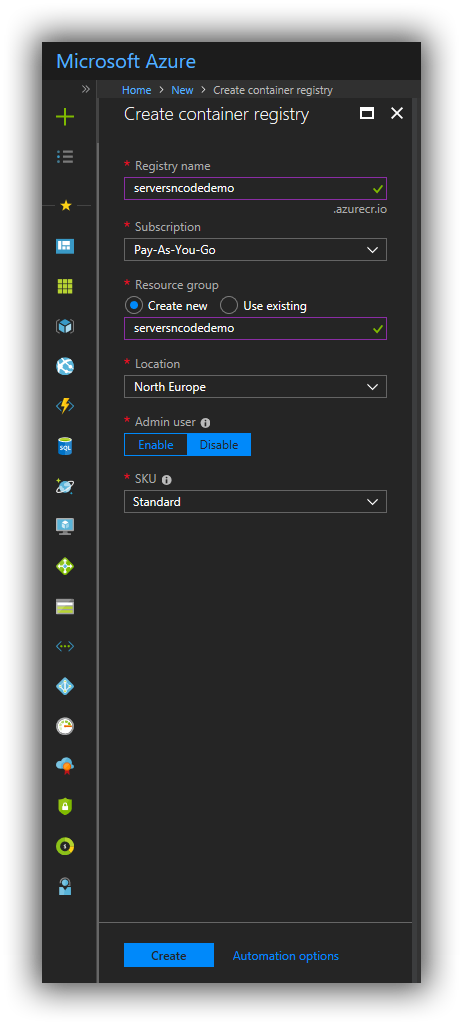
Then we need to setup our new registry.

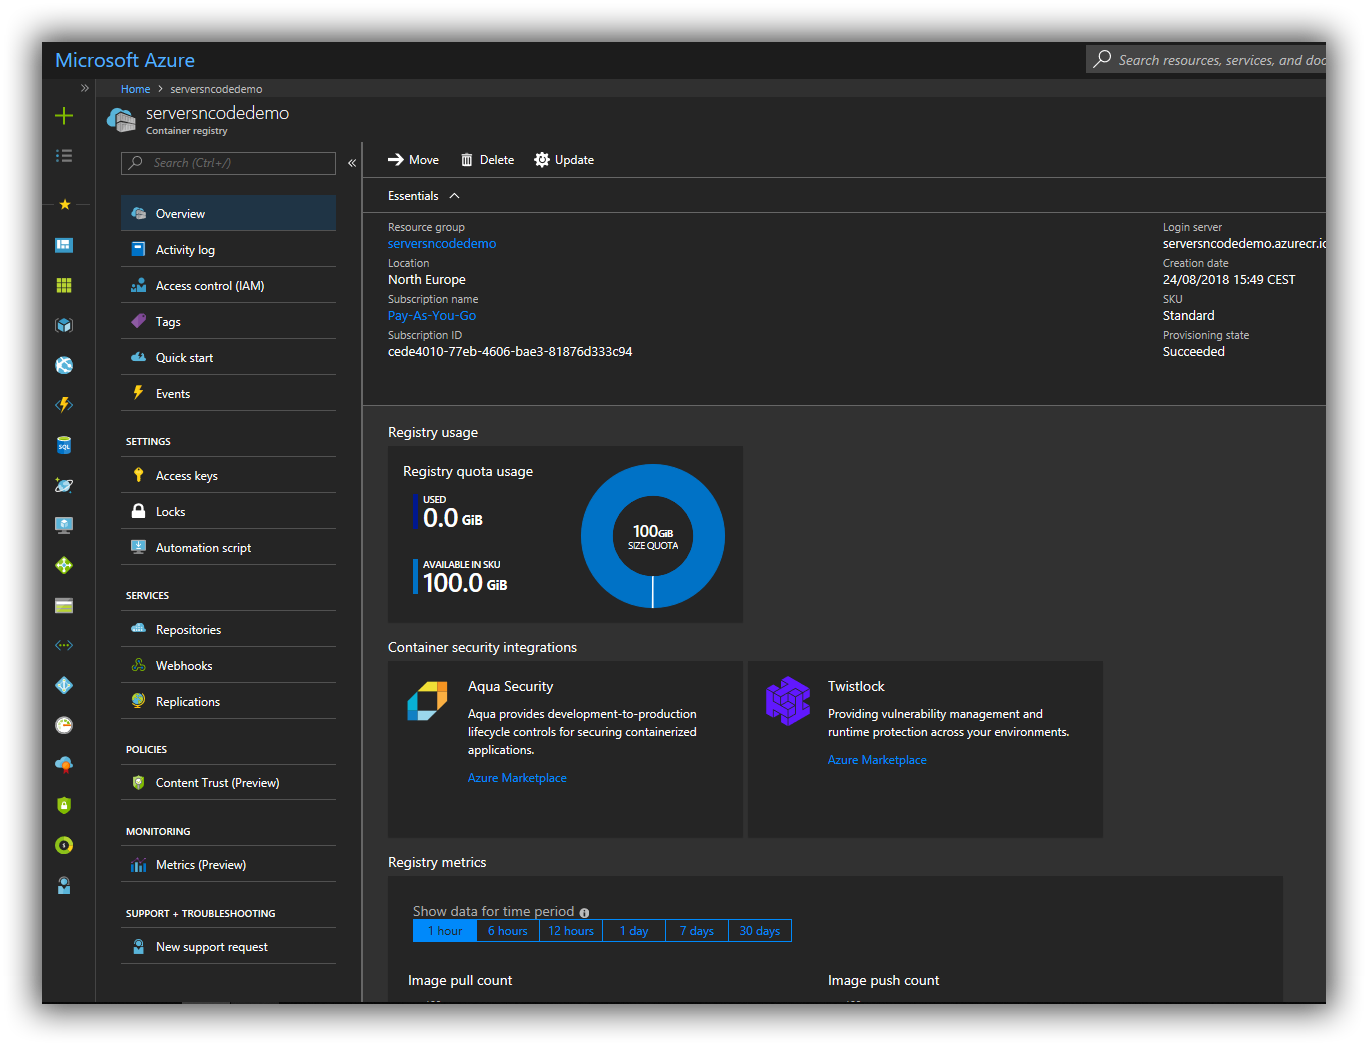
Once you create the new registry we wait for Azure to create it and tell us it's ready.

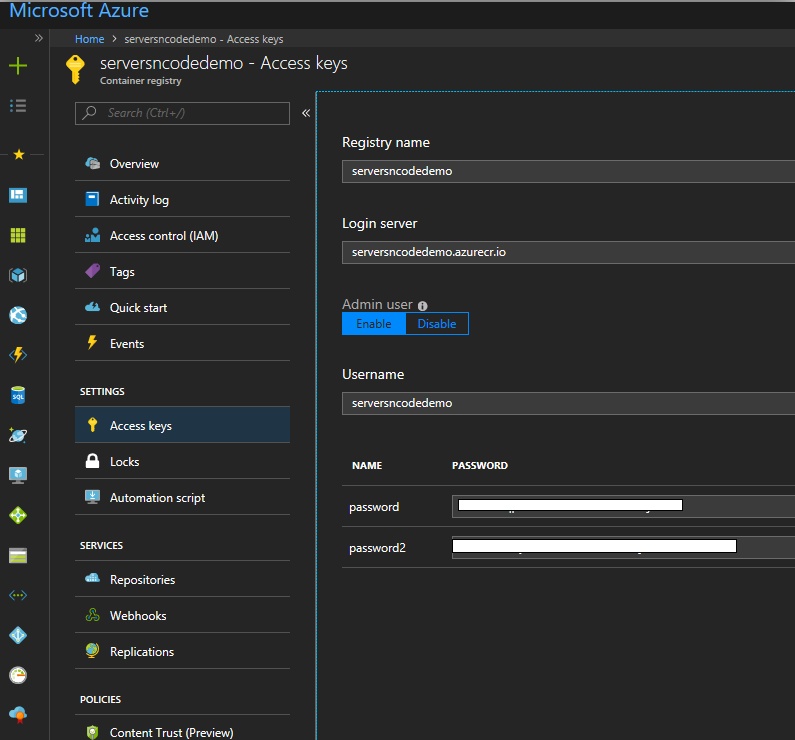
Next we need to get access to our new registry so we can log in and load our images. In the registry menu, select "Access Keys" - I set the admin user to enable so I can use a username / password to access my container registry.

Once you have these we need to log into it from docker, by default docker will log into docker hub.
docker login serversncodedemo.azurecr.ioThis will then prompt for the username / password from the Azure container registry Access keys.
That's it your now logged into your own Container registry.
To push an image to your own registry you need to tag the image as your registry.
docker tag demowebapp serversncodedemo.azurecr.io/demowebapp
docker push serversncodedemo.azurecr.io/demowebapp
