Table of Contents
Nunit is a unit testing framework for .NET, it was ported from a Java called JUnit.
More About NUnit here. My earlier post about Testing and Unit testing About Unit Testing
Getting Started with NUnit
It's easy to add Nunit, just Create a new Class Library on your project.
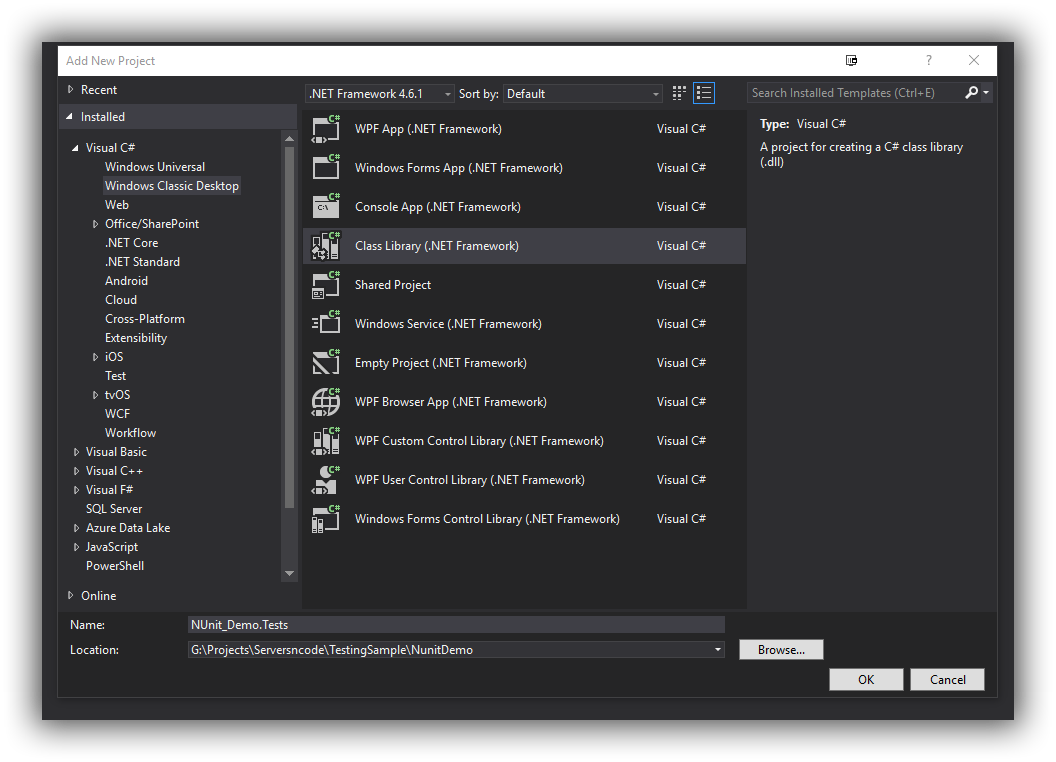
Then run Package installer and install the nuget package to the new class library
PM > Install-Package NUnit
Then in your new Class Library create a new Class - DemoTests, our first test will look like this.
[TestFixture]
class DemoTest
{

    [Test]
    public void FirstTest()
    {

        Assert.IsTrue(true, "Hello Test World!");
    }
}
[TestFixture]
Is added to the class, this will tell the test running that this class is for tests. But it has alot more power we'll get into that later in other posts.
Our First test method is simple.
[Test]
Tells the test running that this is a test.
Assert.IsTrue(true, "Hello Test World!");
Assert.IsTrue is how we tell the test has passed, failed or something else has happened.
Running the Test
But enough it's time to run the test. First thing, Add a reference to your Tests Libarary and reference the main project.
Then on the test page in Visual Studio 2017 you have an icon, on the right margin. When you mouse over it, it says "NUnit Test (click to run)"
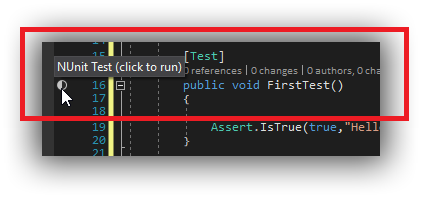
Click it! Go on Click it,
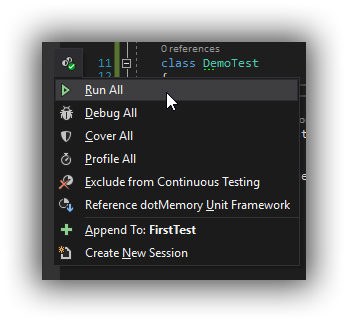
And then hit run!
If you clicked it you have now run your first test congratulations.
I didn't have the NUnit Test Adapater installed at the time of running this test. I didn't need it, Visual Studio knows enough about the tests to be able to run it.
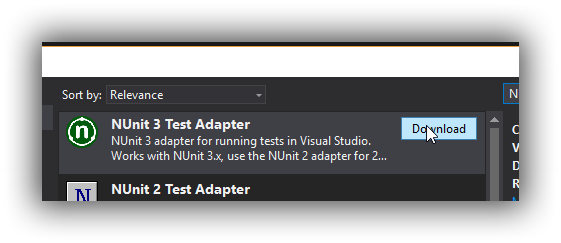
Go ahead and install it and do the whole restart of Visual Studio.
Once your back in go to "Test - Windows - Test Explorer"
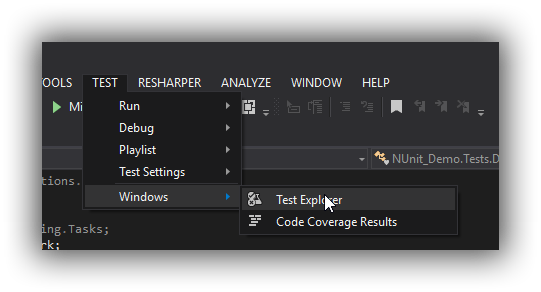
This will open the Test Explorer window in Visual Studio and our "FirstTest" should be listed there. (If it isn't build the project, I find sometimes I have to run the web app in some cases to get VS to pick up my tests first)
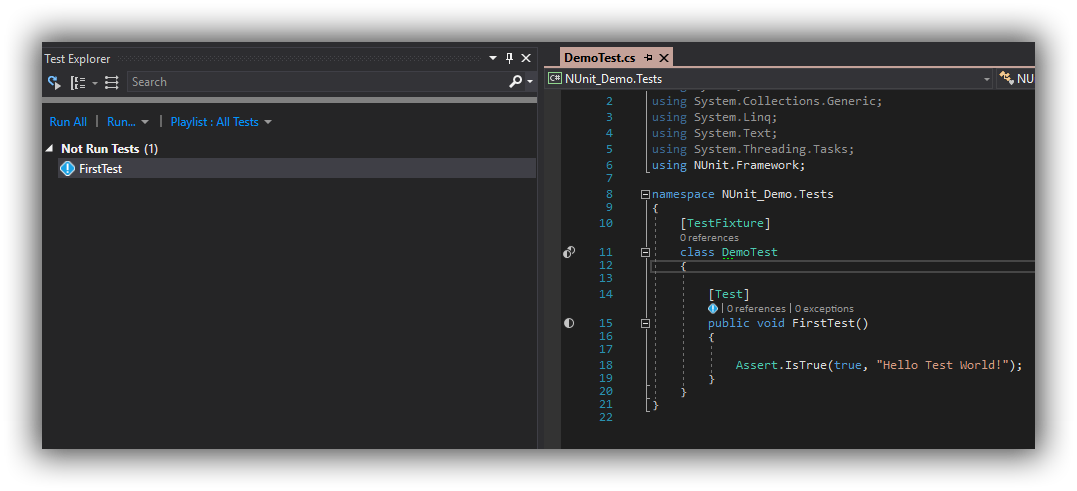
You know what to do. Click run and lets watch what happens.
The test runs and passes because we told it to and we also see how long it took and we've green everywhere.
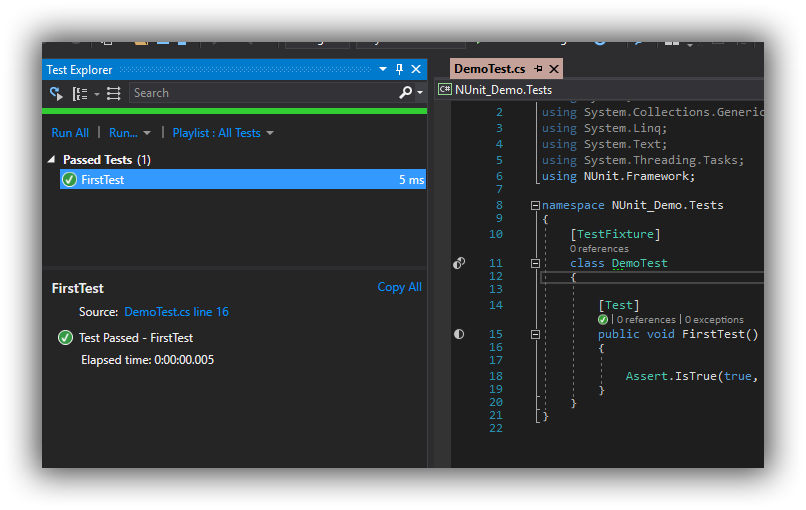
I don't know about you but sometimes I don't trust a test has worked until I can watch it fail so lets make it fail.
This is easy to do, in the First test change the Assert.IsTrue line.
Assert.IsTrue(false, "Test has Failed!");
We've changed it to be false and also changed the note that will be output.
So when we run this test now it will fail.
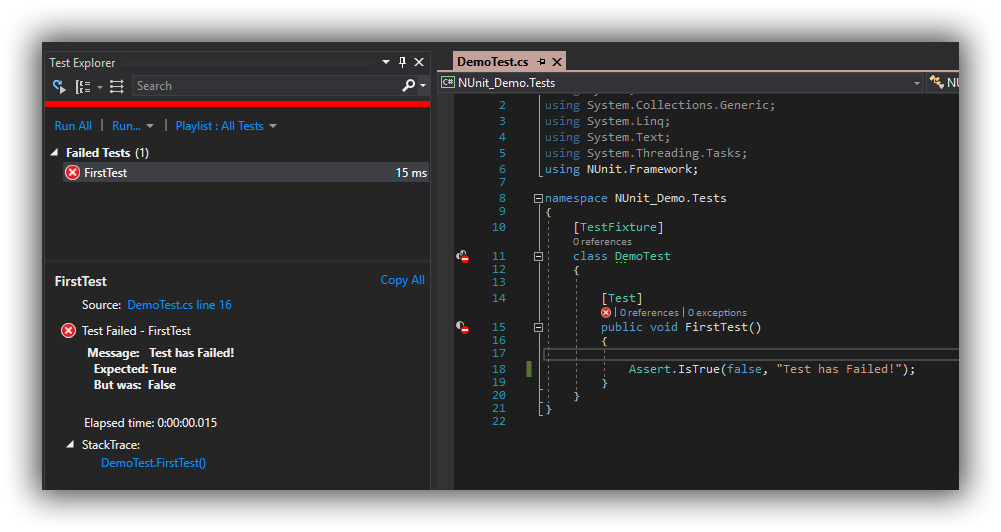
As you can see our first test has failed. We see the message we have loaded in as well in the output so we know why it failed.
Next time on Serversncode
As you can see it is really easy to create a NUnit test in Visual Studio 2017 but this is a very simple set of tests. Next Time around we'll start building some more detail tests. Getting into testing our Database connection and how do we test user signups.
I'll also go into how to wire into Visual Team Services and the full CI / CD and how to get these Unit tests to be a part of that process.
Next Part Real Nunit Tests

